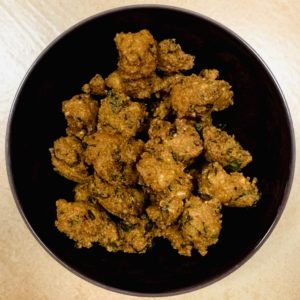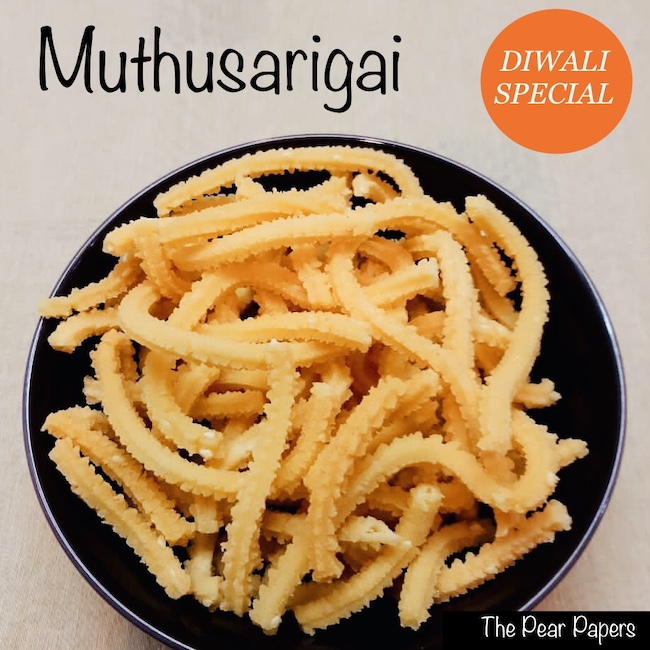
Muthusarigai
It’s Diwali time! The festival of lights is an occasion for good food, celebration and joy for Hindus all over the world. In India, families make and distribute traditional dishes passed on from generation to generation with their near and dear ones. Muthusarigai is one such traditional snack made during Diwali in my family.
‘Muthu’ means pearl and ‘Sarigai’ refers to the woven silk thread design in the world famous ‘Kanchipuram Silk Saree’. Muthusarigai has a pearly white colour and the crisp edges seen on the surface resemble the sharp design woven in the silk saree.
From childhood this has been my favourite snack during Diwali. I’m happy to share the recipe of this traditional gem from my kitchen to yours.
Ingredients
Raw rice – 3 cups
Moong dhal – 1 cup
Chana dhal – 1 1/2 tbsp
Salt – 1 1/2 tsp
Asafoetida (hing) – 1/4 tsp
White sesame seeds – 3 tsp
Unsalted butter – 3 tbsp (at room temperature)
Oil for deep frying – as required
Water ~ 2 cups
Yield
~ 1 kg
Special requirements
Access to a flour mill (optional)
Murukku maker (see Notes for alternatives if you don’t have this)
Prep time
10 mins
Cook time
1 hour
Method
1) In a shallow pan, dry roast both moong and chana dhal on low heat. Roast until it is warm to the touch. Set aside to cool.
2) Mix the raw rice with the roasted dhals and get it ground to a fine powder like a flour at a commercial flour mill. (We do this quite often in India, but if you don’t have access to a flour mill, you can use store bought flours of the dhals and rice in the same proportion to make muthusarigai.) Make sure the store bought flour is fresh.
3) In a wide bowl take the milled flour and add all ingredients other than oil and water. In a circular motion, hand mix everything so that the salt and butter are incorporated completely with the flour.
4) Heat the oil for deep frying in a wide pan/kadai. Use the star dye of the Murukku maker for this. Grease the contours of the Murukku maker with a drop of oil.
5) Take small portions of the flour mixture and mix enough water to make a tight dough. When you try to roll the dough between your fingers, it should roll without any cracks or lumps. It shouldn’t stick to your fingers too. This is the right consistency of the dough. Fill the Murukku maker with the dough and keep ready.
6) Test the oil to see if it is ready to deep fry the muthusarigai (Note 3). If you are satisfied, carefully squeeze out the dough in spirals, through the Murukku maker into the hot oil.
7) Let it fry for around a minute, then flip the muthusarigai carefully inside the oil and fry the other side too. It should take around 3 to 4 mins to fry each batch fully. Once the bubbling of the oil subsides, the muthusarigai will float and the hissing noise would have gone.
8) Now remove the muthusarigai from the oil and drain them in a colander lined with absorbent kitchen paper towels. Let them cool down to room temperature. Then transfer it to an airtight container. Can be stored for 10-12 days maximum.
Notes
- While roasting the dhals, make sure to roast them on low heat so that the inherent moisture is removed and the dhal doesn’t change color.
- Always mix all the dry ingredients first before you add water to make dough. Prepare the dough in small batches and deep fry. This helps in 2 ways, first, since the dough is prepared fresh for each batch of deep frying, all the muthusarigais come out in uniform colour and crispness. Second, the dough cannot be stored. So if you cannot deep fry the entire dough, you can store the leftover dry mixture in the refrigerator and use after 2 or 3 weeks also.
- If you don’t have a Murukku maker, then try the same process using a regular piping bag used for cake decoration. Use the star nozzle at the end of the piping bag. Remove extra air from the bag by gently squeezing the bag after filling the dough. Now squeeze out dough in small spiral shapes onto a greased parchment paper. Gently pick these spirals off and deep fry them.
Beginners’ tips
- To test if the oil is hot enough, gently drop a tiny piece of the prepared dough into the oil. If it rises from the bottom of the pan to the surface in just about 4 to 5 seconds with a hissing noise and bubbles, then it means the oil is ready to fry.
- Keep the oil in medium heat constantly while frying. If the oil is too hot then the muthusarigai will quickly turn dark without getting cooked properly. If the oil is not hot enough then the muthusarigai will absorb a lot of oil and will not be crispy.