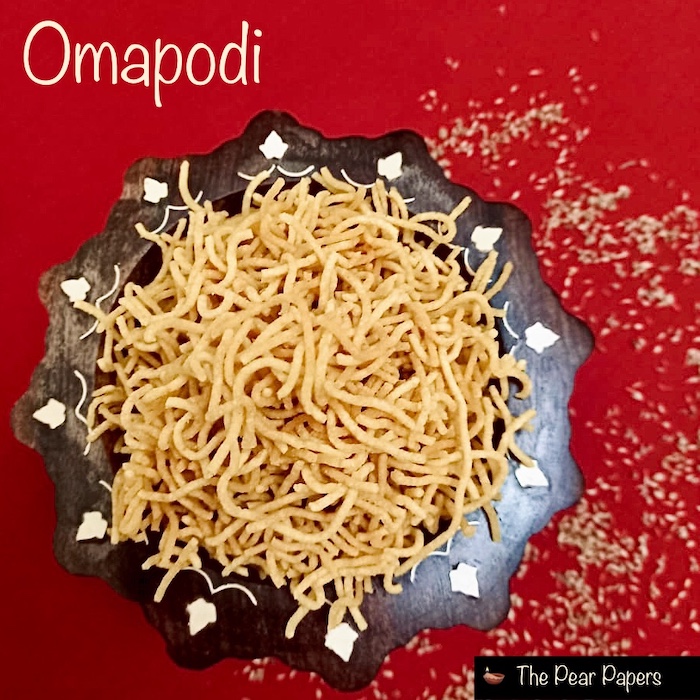
Omapodi
It’s Diwali time again! Every year we wait for this one festival to indulge and share goodies with family and friends. With the weather getting cooler, it brings the festive mood around everywhere. I am very happy to share yet another Diwali memory and this wonderful recipe for Omapodi with you all!
When I was in school, my grandma used to start making different varieties of savoury snacks and traditional South Indian sweets a few days before Diwali. The house would be filled with the awesome aroma of all these snacks and sweets.
Omapodi is a slightly spicy savoury snack made from chickpea flour and flavoured with omam (carom seeds). Along with adding a nice strong flavour to the omapodi, omam also helps with digestion (especially for people who have a sensitive stomach).
Ingredients
Chickpea flour (besan) – 3 cups
Rice flour – 2 cups
Carom seeds (omam) – 3 tbsp
Salt – 1 1/2 tsp (or to taste)
Red chilly powder – 1 1/2 tsp (or to taste)
Unsalted butter (room temperature)/hot oil – 3 tbsp
Oil for deep frying – as required
Water – as required
Yield
~ 1 kg
Special requirements
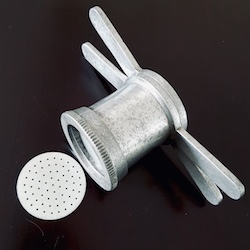
Murukku maker (using the disc with smallest holes, called omapodi disc)
Prep time
2.5 hrs
Cook time
45 mins
Method
1) Soak the omam in about a quarter cup of hot water for a couple of hours. After soaking, grind this to a fine paste. Add a cup of water and dilute this omam pulp. Strain this through a fine sieve and discard the goo to get a strong decoction.
2) Take the chickpea flour, rice flour and chilly powder together in a bowl and sieve twice to remove any lumps or impurities.
3) In a wide bowl, take the sieved flour mixture, add salt and mix well. Add your butter at this stage. If you want to make this recipe vegan, add hot oil instead of butter. You can use any neutral oil for this. Mix the fat into the flour mixture with your hand and make sure it is evenly distributed throughout.
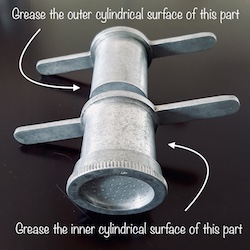
4) Heat the oil for deep frying in a wide heavy bottomed pan/kadai. Use the small holed disc of the Murukku maker for this. Grease the insides of the bottom part of the Murukku maker with a drop of oil. Do the same for the outer surface of the top part. This is to prevent the dough from sticking to the sides of the Murukku maker.
5) Divide your flour mixture into five portions. Divide your omam decoction into five portions as well. Take one portion of each and combine to form a dough. Add water to the dough to make a very soft pliable ball. You should be able to squeeze the ball comfortably into the Murukku maker and then through the tiny holes as well. This is the right consistency. Fill the Murukku maker with the dough and keep ready.
6) Test the oil to see if it is ready to deep fry the Omapodi. If you are satisfied, carefully squeeze out the dough in spirals, through the Murukku maker into the hot oil.
7) Let it fry for around a minute, then flip the Omapodi carefully inside the oil and fry the other side too. It should take just about 2 mins to fry each batch fully. Once the bubbling of the oil subsides, the Omapodi will float and the hissing noise would have gone.
8) Now remove the Omapodi from the oil and drain it in a colander lined with absorbent kitchen paper towels. Once you’ve fried all the dough in the first batch, make a fresh new batch of dough. Grease the Murukku maker again, fill the new dough and fry. Repeat this process till you’ve fried everything.
9) Let your Omapodi cool down to room temperature and then transfer to an airtight container.
Notes
- This recipe can be made with different flavours as well. You can make this plain (without omam and chilly powder), just with chillies alone, or with chillies and garlic. Grind whatever ingredients you fancy and use only a strained decoction like we’ve done here.
- You can strain the Omam decoction several times to make sure there are no large particles in there. Impurities can block the tiny holes and make it harder for you to squeeze the dough out.
- Always mix all the dry ingredients first before you add water to make dough. Prepare the dough in small batches and deep fry. This helps in 2 ways, first, since the dough is prepared fresh for each batch of deep frying, all the Omapodi come out in uniform colour and crispness. Second, the dough cannot be stored. So if you cannot deep fry the entire dough, you can store the leftover dry mixture in the refrigerator and use after 2 or 3 weeks also.
- The shelf life of deep fried snacks changes depending on what fat you use to make the dough. If you use butter, the shelf life is longer (can be stored up to 3 weeks at room temperature). If you are vegan and want to use oil, the shelf life is shorter (can be stored up to a week at room temperature). Both these variations taste the same, only the shelf life varies!
Beginners’ tips
- To test if the oil is hot enough, gently drop a tiny piece of the prepared dough into the oil. If it rises from the bottom of the pan to the surface in just about 4 to 5 seconds with a hissing noise and bubbles, then it means the oil is ready to fry.
- Keep the oil in medium heat constantly while frying. If the oil is too hot then the Omapodi will quickly turn dark without getting cooked properly. If the oil is not hot enough then the Omapodi will absorb a lot of oil and will not be crispy.
- Stick to the recipe for the omam quantity. Too much omam will make the Omapodi bitter!